Augmented Reality eDrawings
Augmented Reality with eDrawings
Imagine being able to take a CAD model from SolidWorks and view it on a mobile device in real time with real objects. What seemed to be impossible is quite real and easy to do!
What is Augmented Reality
Augmented reality, or AR, is technology that uses a computer-generated image in combination with the users view in the real world creating an item that can be seen next to real items. A couple of well-known apps that have brought this technology to the mainstream have been Pokémon Go and Snapchat. Both apps have been able to take their created content and allow the user to view them in day to day life with the users given surroundings.
Software
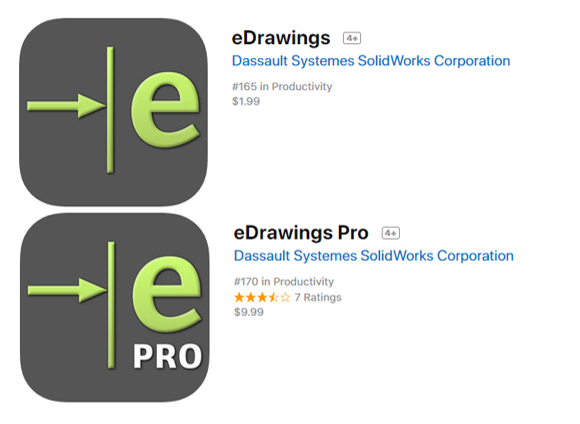
The software we have been using at Perception Engineering to view our created CAD models is eDrawings. This app is available for download in both the iOS app store and the Google Play store, however, the AR will only work for iOS currently. There are two different version: eDrawings for $1.99 and eDrawings Pro for $9.99. From what I’ve seen reading and learning about these softwares, there isn’t much of a difference, on the AR side at least, between the two. One thing that the Pro version can do is allow the user to view cross sections of the imported models inside and outside of the AR mode.
Figure 1: eDrawings Apps
Setting up Files and Using the Software
We will be mainly be going through the step-by-step process of taking a SolidWorks part/assembly file and opening it in AR with the eDrawings app. The steps for importing an EASM or STEP will be very similar with the only difference being the file types.
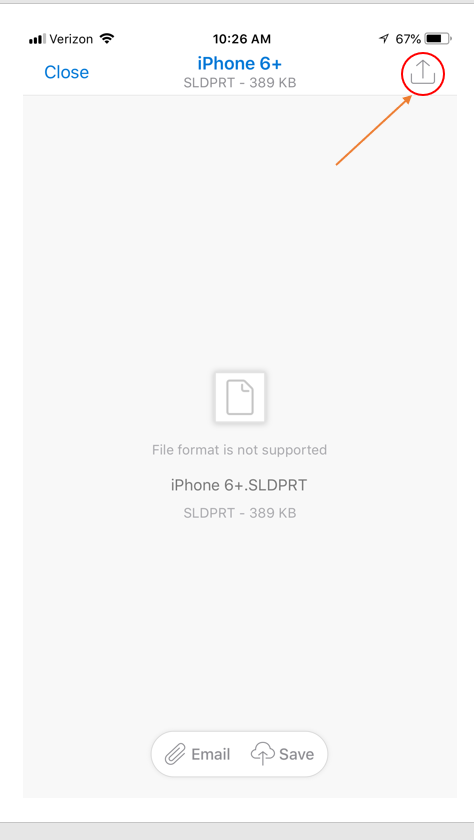
The first step is to get the file to view in AR on your tablet or mobile device. This is accomplished by emailing the files to the device.
Figure 2: Emailing Part File
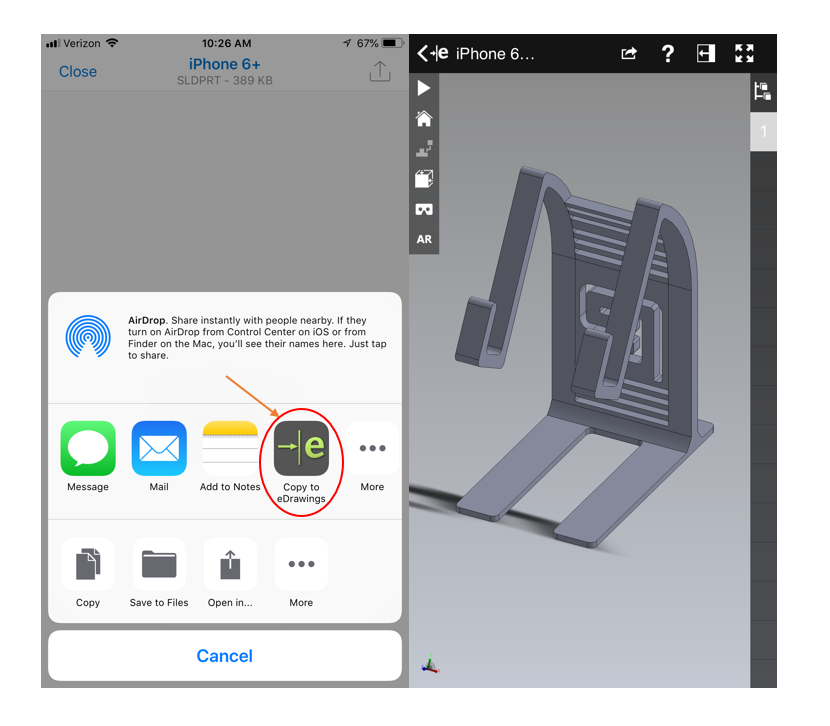
These files can either be downloaded and saved to the phone or they can be opened directly into the eDrawings app. For this example, we won’t download and save the file.
Figure 3: Opening Window
When selected to “Copy to eDrawings”, it will open the file directly into the eDrawings app!
Figure 4: Part in eDrawings App
Once the file is on the tablet or mobile device, the next step is to acquire the QR code and print it. This is done using the app by opening the part in the app, selecting AR from the menu, and choosing the “Get Marker” option. This will open the QR code and prompt the user to input an email address. This QR code is not unique from part to part, the software determines which file to show in AR based on which part is open in the app.
Figure 5: QR Code
Now it’s as simple as pointing the QR code on the screen to the printed off code. The model can be spun around using one finger and panned on the screen using two fingers. The model will also come in with a 1:1 scale based on the size of the QR code.
Figure 6: Viewing Model in AR
Tips and Tricks
There are a couple of little tips and tricks with using this software that can aid in having an overall better experience. The first one is manipulating some of the components inserted if they’re in an assembly. This software allows the ability to either hide or make the component transparent if a better, clearer view is desired. This is done by selecting the pop-out manager highlighted in Figure 7. At the bottom right corner of the screen are to make selected components either hidden/shown or solid/transparent. Simply select which option to apply and then select the component for an instant update. Components can either be selected in the feature tree flyout or on the assembly.
Figure 7: Hide/Show and Transparent/Solid Options
The next tip is cleaning up the user interface for a better view of the augmented model. The app can appear cluttered at first but simplifying and hiding all the options is a click away. Highlighted in Figure 8, simply select this expand/compress option and all the information will be hidden except the model and the option to bring back the information.
Figure 8: Simplified Interface
Issues
With this technology still being new, there are still some bugs and issues that will become more and more noticeable while using the software. One issue that will become obvious is the file size can’t be too large. If it ends up being too large, there will be a lot of stutter points when trying to rotate or pan the model. There is also the possibility of the app crashing because it can’t handle all the data/information being imported. This can be adjusted some by either defeaturing the components or removing some of the unnecessary components. Unnecessary components to the overall structure being things like nuts and bolts.
One other issue is the model when it’s inserted being too large. Some tests were done changing the size of the QR code, but some items still came in too massive to where it was impossible to see any portion. The only solution to this has been trying to adjust the scale immediately after locating the QR code. That is done by selecting the option under the AR button (highlighted in Figure 9) and manually typing in the scaled percent to try and fit in the view.
Figure 9: Scaling Option
Conclusion
In summation, this a fun and useful app to have! We here at Perception Engineering have been taking some of the different models we’ve worked on in the past and viewing them with this eDrawings app. Though it may seem limited in what we can do with this app, it’s only the beginning of the changes coming with new technology.
Thanks for reading, for any inquiries or contracting services, please don't hesitate to reach out to us!


